Introduction to Christmas Cherry Bars
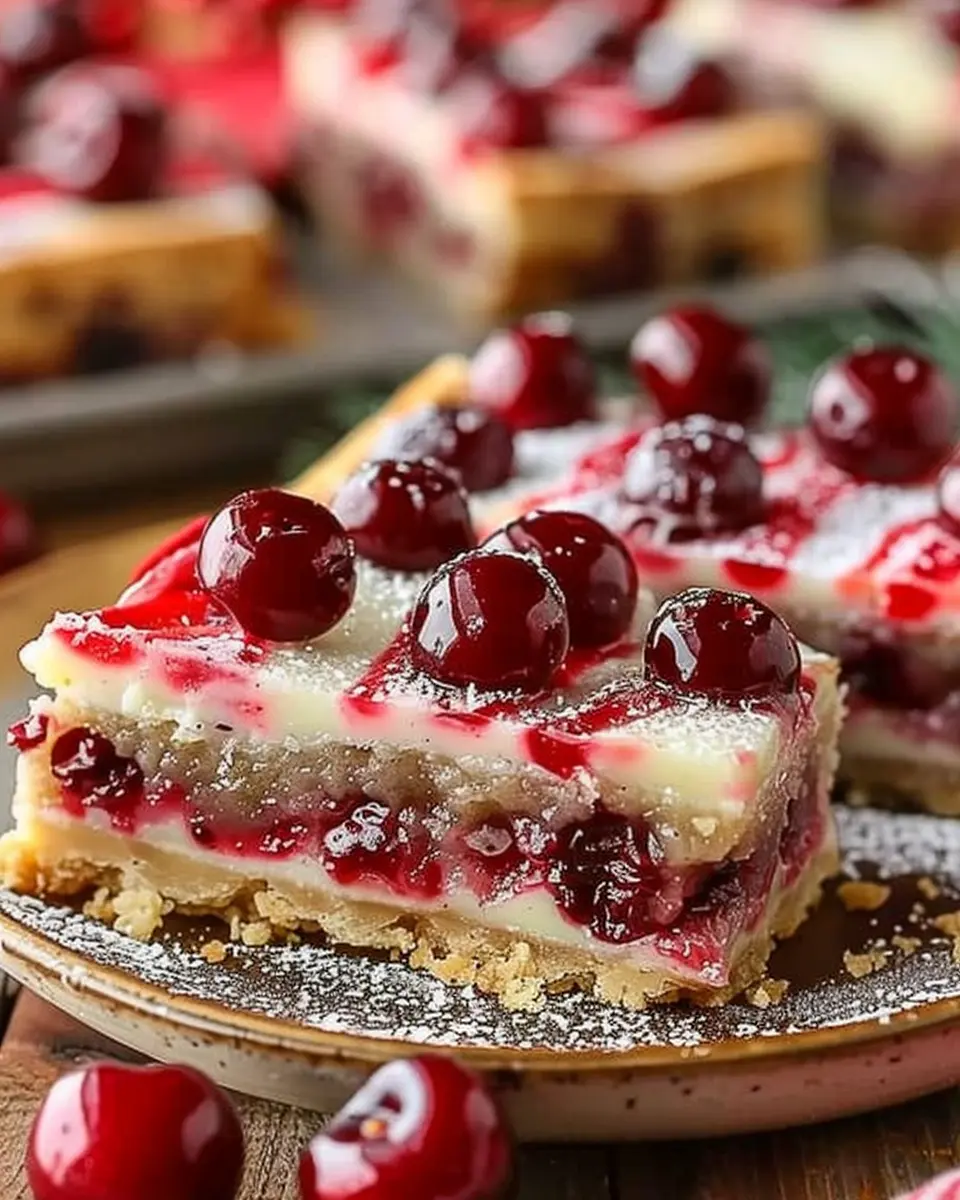
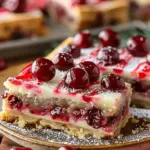
When the holiday season rolls around, the air is filled with the delightful aroma of baked goods, family gatherings, and festive cheer. This is precisely why Christmas Cherry Bars make for an irresistible holiday treat. Imagine a buttery, crumbly base layered with sweet, tangy cherries, all topped off with a crunchy streusel. These bars are not just a dessert; they’re a celebration of the season, making them perfect for holiday parties or cozy nights in with loved ones.
Why Christmas Cherry Bars are a Festive Treat
The vibrant red of cherries symbolizes the joy and warmth of the season, adding a splash of color to your dessert table. But it’s not just about looks; cherries are packed with health benefits, too. According to the Cherry Marketing Institute, cherries are rich in antioxidants, which can help reduce inflammation and support overall health. As you enjoy these delicious Christmas Cherry Bars, you can also feel good about indulging in a treat that has some nutritional value.
Not only do these bars satisfy your sweet tooth, but they also evoke nostalgic memories of baking in the kitchen with family. Remember the excitement of stirring up the batter or the delightful taste of fresh cherries as they burst in your mouth? Creating this recipe can foster those cherished moments and bring everyone together, whether you’re hosting a holiday get-together or simply sharing a quiet evening with friends.
Unique Flavor Profile
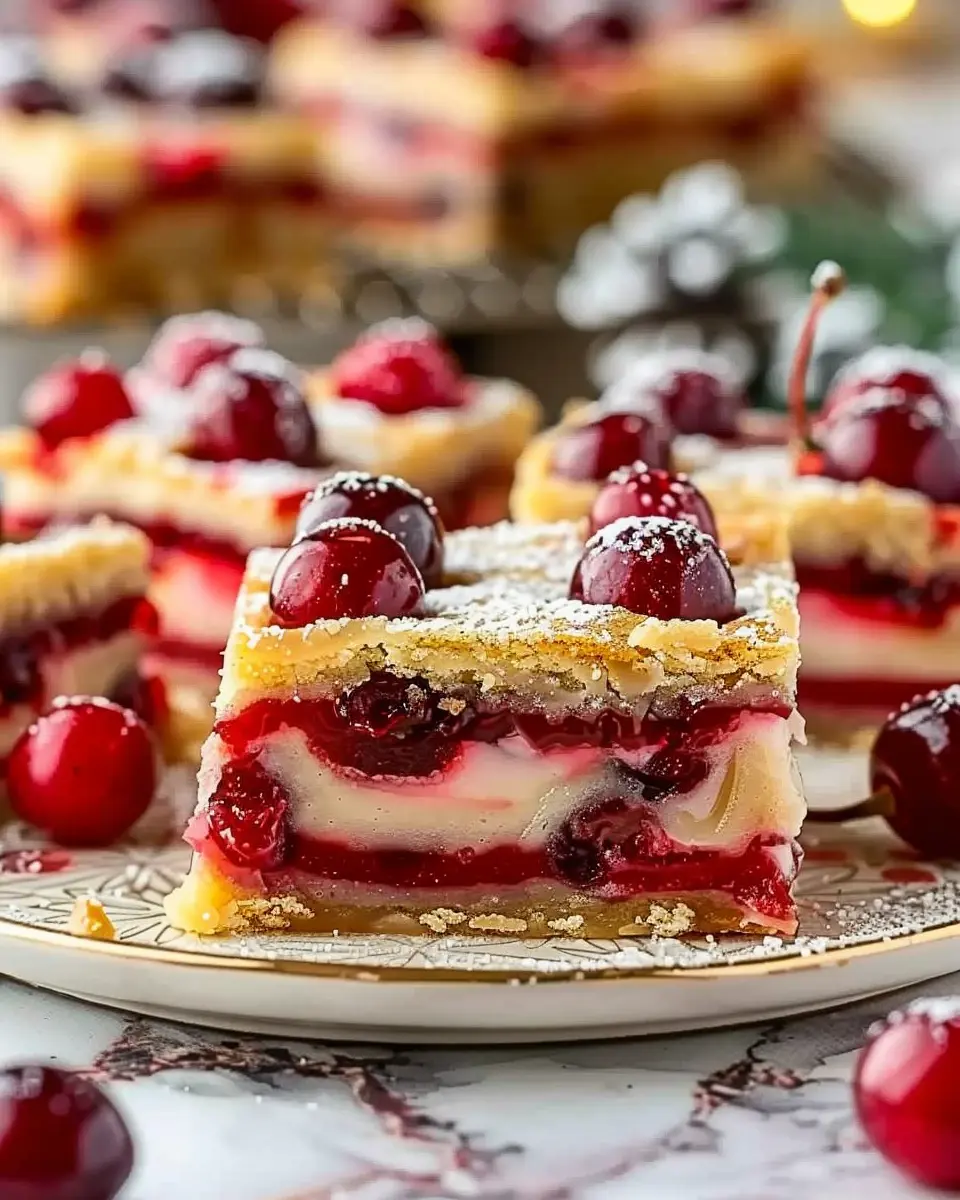
What sets Christmas Cherry Bars apart is their unique combination of flavors. The sweetness of the cherries balances beautifully with a hint of zesty lemon, creating a vibrant taste experience. Plus, the crunchy streusel topping adds a delightful texture that makes each bite irresistible. You could serve them warm with a scoop of vanilla ice cream for a truly festive dessert.
Sharing the Joy
Do you know someone who loves cherry desserts? These bars make fantastic gifts! Wrap them in festive packaging for a homemade treat that’ll brighten anyone’s day. Whether you’re bringing them to a potluck or surprising a neighbor, sharing Christmas Cherry Bars embodies the spirit of giving.
In the following sections, we’ll dive into the recipe, ensuring you can whip up these delightful bars in your kitchen with ease. Let’s spread some holiday cheer through the joy of baking!

Ingredients for Christmas Cherry Bars
When it comes to making delightful Christmas Cherry Bars, gathering the right ingredients is key to baking up a festive treat that everyone will love. Here’s what you’ll need for that perfect mix of flavors and textures:
-
Crust:
-
1 cup of all-purpose flour
-
1/3 cup of granulated sugar
-
1/2 cup of cold butter, cut into small pieces
-
1/4 teaspoon of salt
-
Filling:
-
1 can (21 oz) of cherry pie filling
-
1 teaspoon of almond extract
-
1 tablespoon of lemon juice
-
Topping:
-
1/2 cup of rolled oats
-
1/3 cup of brown sugar
-
1/4 cup of all-purpose flour
-
1/4 cup of softened butter
-
1/2 teaspoon of cinnamon
As you embark on creating these sumptuous Christmas Cherry Bars, remember that high-quality ingredients can elevate your baking game. The delightful blend of sweet cherries and a crumbly crust is sure to impress your friends and family, making your holiday gatherings even more special. Check out this resource for additional tips on selecting the best baking ingredients.
Step-by-Step Preparation for Christmas Cherry Bars
Making Christmas Cherry Bars is not only a delightful culinary adventure but also an opportunity to create lasting memories with friends and family during the holiday season. Below, I’ll guide you through each step of the preparation process, ensuring that you create a delicious and festive treat everyone will love!
Gather Your Ingredients
Before diving into the actual baking, it’s essential to gather all your ingredients. Here’s what you’ll need for those irresistible Christmas Cherry Bars:
- For the crust:
- 1 ½ cups all-purpose flour
- ½ cup granulated sugar
- ½ cup unsalted butter, softened
- 1 large egg
- 1 teaspoon vanilla extract
- 1/2 teaspoon salt
- For the cherry filling:
- 1 can (21 ounces) cherry pie filling
- For the crumble topping:
- 1 cup rolled oats
- ½ cup brown sugar
- 1/2 teaspoon cinnamon
- ½ cup unsalted butter, melted
- 1 cup all-purpose flour
Ensure that you have everything you need before you start to avoid any last-minute grocery runs.
Prepare the Crust
To kick things off, we’ll prepare the crust. In a large bowl, cream together the softened butter and granulated sugar until the mixture is light and fluffy. Adding the egg and vanilla extract into the mixture blends beautifully, making it almost aromatic! Next, gradually mix in the flour and salt until a soft dough forms. Once combined, press this dough evenly into a greased baking pan, making sure it forms a nice base for those Christmas Cherry Bars.
Create the Dough
Creating the dough is straightforward. There’s no need for fancy techniques here—simply blend the butter, sugar, egg, and vanilla, then add in your dry ingredients. If you get it right, it should have a slightly sticky texture but not too wet. Incorporate a bit of patience and love into the mixing process, and you’ll have a lovely dough that solidifies beautifully in the oven.
Bake the Crust
Bake your crust in a preheated oven at 350°F (175°C) for about 12-15 minutes or until lightly golden. You’ll want to keep an eye on it, as oven temperatures can vary. It’s important to bake it just until it starts to turn golden, as the bars will continue to cook once the filling goes in. The delightful aroma of baking dough will fill your home, hinting at the festive treats soon to be made.
Prepare the Filling
While your crust is baking, it’s time to prepare the cherry filling. Open that can of cherry pie filling and give it a gentle stir, ensuring the cherries are well-coated in the syrup. This will help distribute the sweetness evenly throughout the Christmas Cherry Bars. If you want to amp up the flavor, you could consider adding a splash of lemon juice to cut through the sweetness, making the cherries pop even more.
Add the Crumble Topping
Now, for the crumble topping! In a separate bowl, combine rolled oats, brown sugar, cinnamon, melted butter, and flour. This combination results in a delectable texture that contrasts nicely with the cherry filling. Crumble this mixture generously over the cherry layer; it’s all about creating that perfect blissful bite!
Finish Baking the Bars
Now that everything is assembled, return your creation to the oven. Bake your Christmas Cherry Bars for an additional 25-30 minutes, or until the crumble is golden and the filling is bubbly. The anticipation while the bars bake is part of the fun! Once out of the oven, allow them to cool before cutting them into squares. This gives the filling time to set just right.
And there you have it! Your Christmas Cherry Bars are ready to impress. Feel free to explore more holiday recipes here that can pair wonderfully with this delightful dessert. Enjoy spreading the cheer!
Variations on Christmas Cherry Bars
If you’re looking to add a personal twist to your classic Christmas Cherry Bars, you’re in luck! These versatile treats allow for plenty of creative spins. Let’s dive into some delightful variations that will charm your holiday guests and bring a unique flair to your dessert table.
Cherry Almond Bars
For a nutty surprise, try making Cherry Almond Bars. Simple to whip up, this variation incorporates almond extract and slivered almonds, adding a delightful crunch and aromatic flavor. Just mix a teaspoon of almond extract into your batter before spreading it out in the pan. Top with slivered almonds and bake as directed. Not only do they taste great, but these bars also look festive, making them a hit at holiday gatherings!
Chocolate Cherry Bars
If you’re a fan of the sweet and savory combo, you can’t go wrong with Chocolate Cherry Bars. Melding chocolate and cherries creates a rich, indulgent treat worthy of any celebration. Simply fold semi-sweet chocolate chips into your batter before baking. You can even drizzle some melted chocolate over the top after they cool for a touch of elegance. Trust me, these bars can steal the show at any holiday party!
Nutty Cherry Bars
Craving something with a bit more texture? Try Nutty Cherry Bars featuring your favorite chopped nuts. Walnuts or pecans give these bars a satisfying crunch. Just sprinkle a half-cup of your chosen nuts into the batter before spreading it into the pan. This slight modification not only enhances the taste but also packs an extra layer of nutrition, making your dessert a little less guilty.
These variations on traditional Christmas Cherry Bars are bound to impress your friends and family. So, which version will you bake first?
Cooking Tips and Notes for Christmas Cherry Bars
Importance of Using Chilled Butter
When preparing your Christmas Cherry Bars, the temperature of your butter can make a surprising difference. Chilled butter helps create that perfect flaky texture we all adore. It allows for less mixing, which means less gluten development and a tender, crumbly base. Aim for butter that’s cold but not frozen; it should be easy to cut into cubes. For an added touch, you can even refrigerate your mixing bowl!
Cooling Time to Achieve Perfect Cuts
Allowing your Christmas Cherry Bars to cool properly is key to achieving those beautiful, clean cuts. After baking, let the bars sit at room temperature for at least an hour. This cooling process helps the filling set, preventing it from oozing out when you slice. If you can resist the temptation, chilling them in the fridge for another 30 minutes will help make those cuts even sharper. Trust me, your efforts will pay off when you serve them up to family and friends.
For more baking tips, consider checking out culinary resources like America’s Test Kitchen or Bon Appétit.
Serving Suggestions for Christmas Cherry Bars
Perfect pairings with beverages
When it comes to enjoying Christmas Cherry Bars, choosing the right beverages can elevate the experience. Opt for a rich hot chocolate, topped with whipped cream and a sprinkle of cinnamon, which beautifully complements the tartness of the cherries. For a lighter option, consider a sparkling apple cider. Its refreshing bubbles and sweet apple flavor make a perfect match.
For something unique, try serving them with a warm cup of spiced tea. The combination of spices with the festive flavors in the bars creates a delightful harmony. And don’t forget about cold brew coffee—its smoothness will balance the sweet notes perfectly.
Creative serving ideas for gatherings
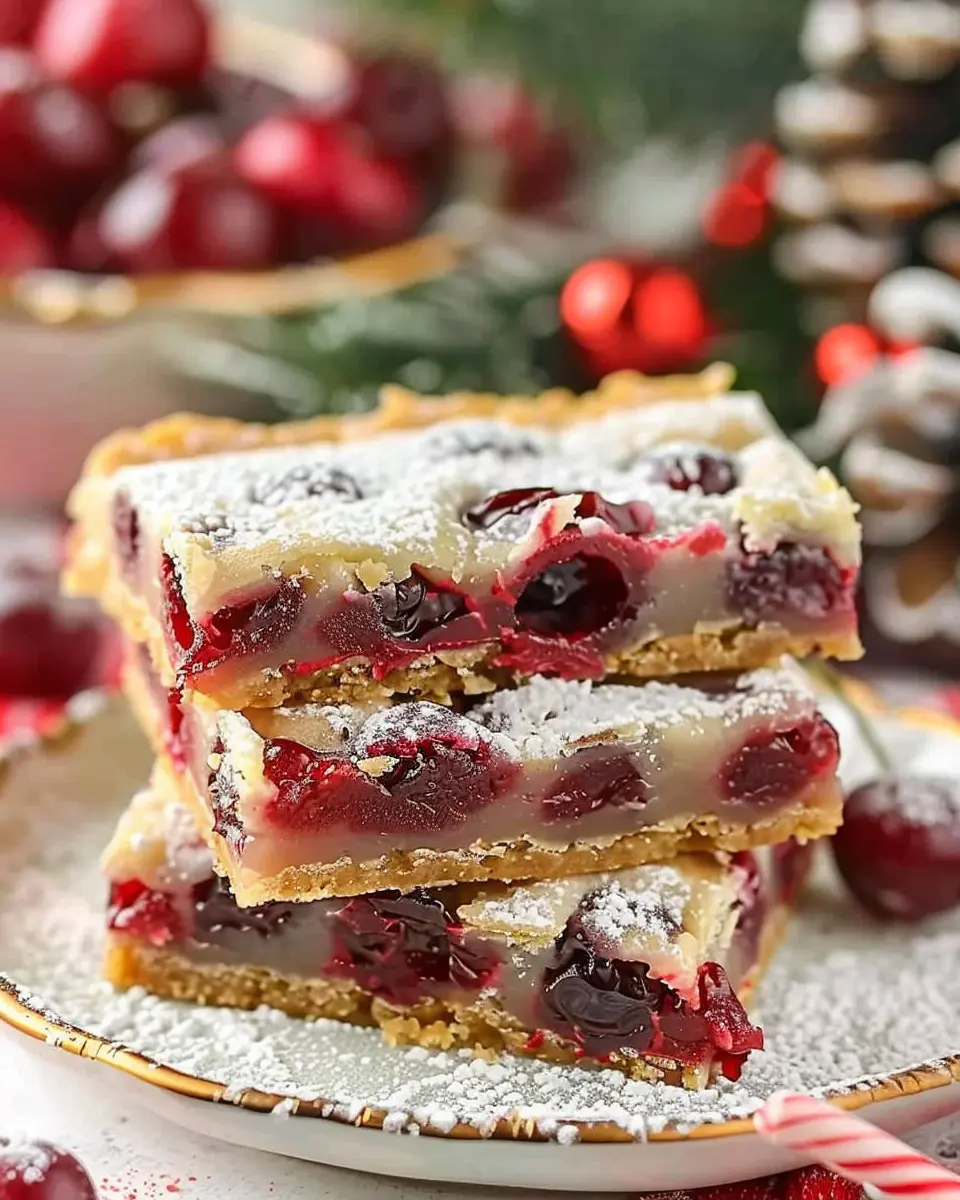
Looking to impress your friends at your holiday get-together? Present your Christmas Cherry Bars on a colorful dessert platter adorned with fresh mint leaves and sprinkled powdered sugar for an eye-catching display.
Alternatively, cut the bars into smaller, bite-sized pieces, and serve them at a dessert station with a variety of toppings—think crushed nuts, chocolate drizzle, or even a dollop of vanilla ice cream. This interactive approach invites guests to personalize their treats, making your gathering all the more memorable.
Lastly, consider packaging some Christmas Cherry Bars as delightful holiday gifts. Wrap them in festive packaging and attach a personalized note for a thoughtful touch. For a little more inspiration, check out ideas from sources like The Spruce Eats.
With these suggestions, your Christmas Cherry Bars will shine bright during this festive season!
Time Breakdown for Christmas Cherry Bars
Preparation time
Making Christmas Cherry Bars is a delightful experience that begins with a straightforward prep time of about 15 minutes. You’ll want to gather your ingredients, which usually include fresh or canned cherries, flour, sugar, and a few other essentials. If you’re in the mood for holiday crafting, feel free to play around with the decorations or toppings during this time!
Baking time
The baking time for these scrumptious Christmas Cherry Bars is approximately 30 to 35 minutes. Your kitchen will smell delightful as the mixture bakes to golden perfection. It’s a great time to rally around friends or family; perhaps share fun stories or laughter while your bars are in the oven!
Total time
When you combine both preparation and baking, you’re looking at a total time of roughly 45 to 50 minutes. In just under an hour, you can create a festive treat that will impress guests and whisk you into the holiday spirit. For more tips on quick holiday treats, check out reliable sources like Food Network or Bon Appétit for some extra inspiration!
Nutritional Facts about Christmas Cherry Bars
Calories per Serving
Each serving of Christmas Cherry Bars contains approximately 150 calories. This makes them a delightful treat that won’t completely derail your holiday health goals. Instead of feeling guilty, you can enjoy these bars while festive gatherings and holiday parties continue.
Sugar Content
These bars have about 10 grams of sugar per serving, primarily coming from the cherries and any sweetener added. While enjoying treats during the holidays is essential, mindful consumption is crucial. Having a well-balanced meal beforehand can help manage your sugar intake.
Healthier Ingredient Swaps
If you’re looking to keep things on the healthier side, consider these swaps for your Christmas Cherry Bars:
- Use whole wheat flour instead of all-purpose for added fiber.
- Natural sweeteners like honey or maple syrup can replace refined sugar.
- Almond milk or other plant-based options can work well instead of whole milk.
For more tips on healthy baking practices, check out resources from Harvard Health. Making these tweaks can help you indulge guilt-free while ensuring your Christmas treats are as wholesome as they are delicious.
FAQs about Christmas Cherry Bars
Can I use fresh cherries instead of dried ones?
Absolutely! While dried cherries are a classic choice for these Christmas Cherry Bars, using fresh cherries can add a delightful twist. Just keep in mind that fresh cherries will have higher moisture content, so you may need to adjust the other ingredients slightly. For instance, consider reducing any added liquids in your recipe by a tablespoon or two to maintain the right consistency. If you’re looking for a fresher flavor, definitely give it a try!
How do I store leftover bars?
Storing your delicious Christmas Cherry Bars is simple! To keep them fresh, place the bars in an airtight container. They can be stored at room temperature for up to 4 days, making them perfect for holiday parties or quick snacks. If you want to extend their shelf life, refrigerating them can keep them tasty for up to a week. Just remember to allow them to come to room temperature for the best texture before serving.
Can I freeze these bars for later enjoyment?
Yes, you can freeze Christmas Cherry Bars! To do this, wrap individual bars in plastic wrap and place them in a freezer-safe container. They should maintain their quality for about 2 to 3 months. When you’re ready to enjoy, simply thaw them in the refrigerator overnight. This is a fantastic way to make ahead and ensure you always have a sweet treat on hand during the busy holiday season!
For more tips on storing baked goods, check out King Arthur Baking and learn how to keep your treats tasting fresh!
Conclusion on Christmas Cherry Bars
Why you should make these bars this holiday season
As the holiday season approaches, Christmas Cherry Bars offer a delightful way to enhance your celebrations. These bars are not just visually appealing; their sweet-tart cherry flavor and buttery crust make them a crowd-pleaser. If you want a dessert that stands out yet is simple to make, look no further!
- Family-friendly: Perfect for all ages, your family will love this festive treat.
- Stress-free prep: They can be whipped up in under an hour—ideal for busy schedules.
- Versatile: Enjoy them with coffee or as a light after-dinner dessert.
With these enticing qualities, why not bring a batch of Christmas Cherry Bars to your next gathering? They might just become a new holiday tradition! For more delicious ideas, check out Food Network’s holiday recipes.
PrintChristmas Cherry Bars: Easy and Indulgent Holiday Treats
A delightful holiday treat that combines sweet cherry flavors with a buttery bar base, perfect for Christmas celebrations.
- Prep Time: 15 minutes
- Cook Time: 35 minutes
- Total Time: 50 minutes
- Yield: 12 servings
- Category: Dessert
- Method: Baking
- Cuisine: American
- Diet: Vegetarian
Ingredients
- 1 cup butter, softened
- 1 cup sugar
- 2 large eggs
- 1 teaspoon vanilla extract
- 2 cups all-purpose flour
- 1/2 teaspoon salt
- 1 can (21 ounces) cherry pie filling
- 1/2 cup powdered sugar
Instructions
- Preheat oven to 350°F (175°C) and grease a 9×13 inch baking dish.
- In a large bowl, cream together the butter and sugar until fluffy.
- Add eggs and vanilla, mixing until combined.
- Gradually add flour and salt, mixing until the dough forms.
- Press half of the dough into the bottom of the prepared dish.
- Spread the cherry pie filling evenly over the dough.
- Dot with remaining dough and bake for 30-35 minutes or until golden brown.
- Let cool, then dust with powdered sugar before serving.
Notes
- Can substitute cherry filling with other fruit fillings for variation.
- For a richer flavor, add almond extract.
Nutrition
- Serving Size: 1 bar
- Calories: 210
- Sugar: 14g
- Sodium: 150mg
- Fat: 8g
- Saturated Fat: 5g
- Unsaturated Fat: 2g
- Trans Fat: 0g
- Carbohydrates: 32g
- Fiber: 1g
- Protein: 2g
- Cholesterol: 40mg